Python Turtle GraphicA Sampler QuiltBy Ziye Liu
M.F.A. Visual Effects, 2012 |
April 4th, 2013
Introduction By breaking down elements in those commonly seen quilt patterns then design algorithms to reproduce them automatically , a computer program is build with functions such as customizable quilt size, dimensions and color scheme. This is the first assignment of Prof. Deborah R. Fowler's VSFX 705 - Programming Concept class in Spring 2013. |
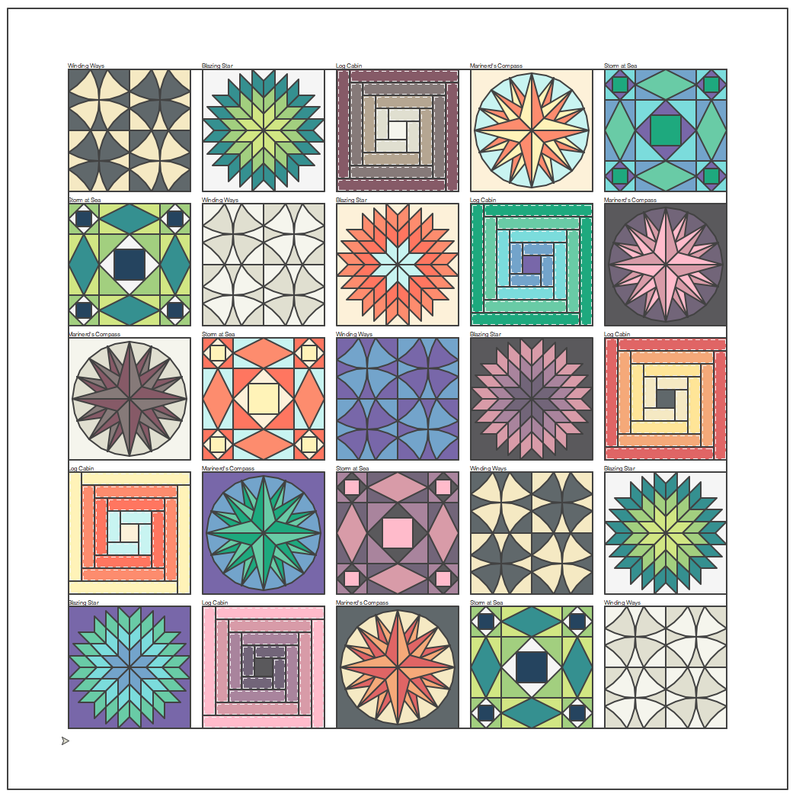
Version 1
5 Patterns, 6 Color Sets in a 5 by 5 Sampler Quilt
March 31st, 2013
|
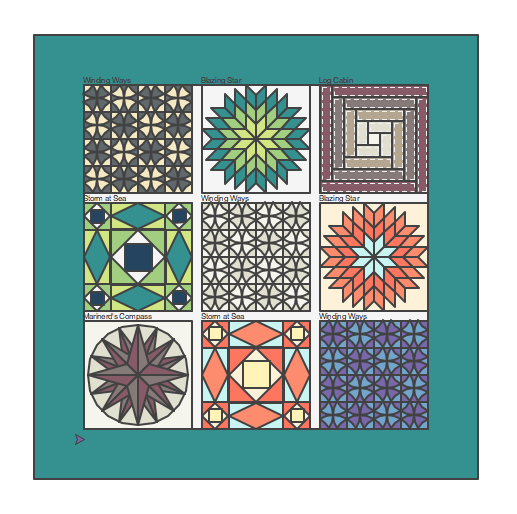
Version 2
Allow user to control the number of rows and columns by typing a number (in the picture above, the number is 3).
Also able to control the sampler quilt's size in pixel unit. Rewrite "Winding Way" pattern's algorithm, add repeating function.
April 4th, 2013
|
Download
The finished code.
Sampler Quilt v2.py |
The assignment's purpose is to get familiar with basic programming concepts such as Variable, If Statement, Loop and Function. By making a sampler quilt using Python's Turtle Graphic Library, more concepts such as Algorithm, Modulus and Nested Loops are introduced.
By the time when dealing with this exercise, I do not have programming background, and my mathematic knowledge is very limited.
|
The Sampler Quilt
Finished Images
Algorithm
|
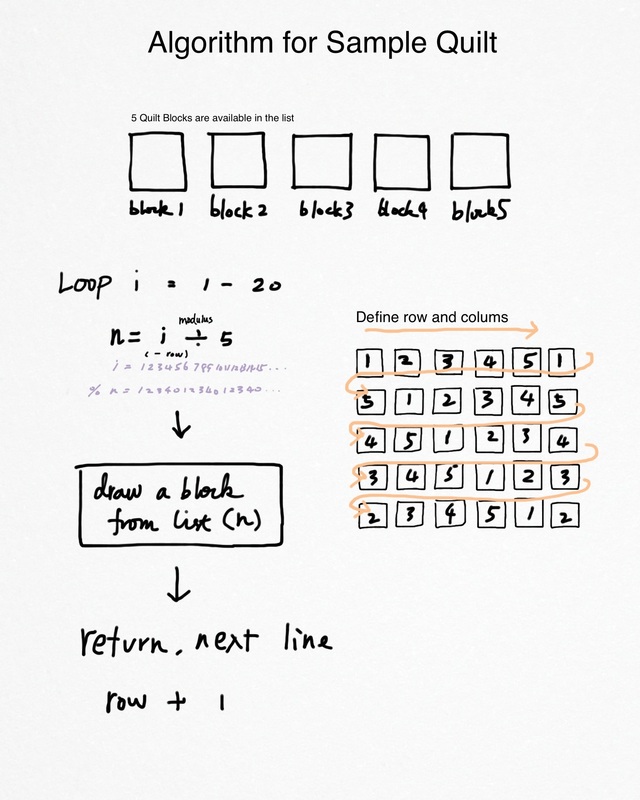
I planned on having 5 different design of quilt blocks, and let the program choose the color palette from 6 different color sets.
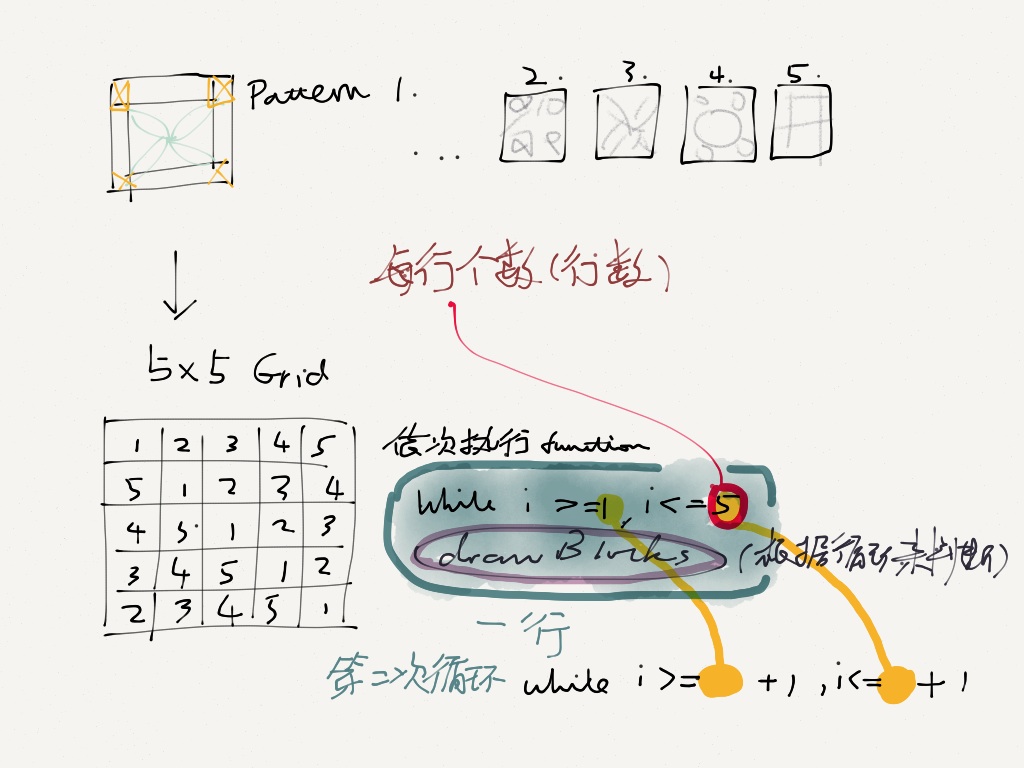
In order to let the quilt blocks appear in a cyclic movement, I designed 3 different solutions:
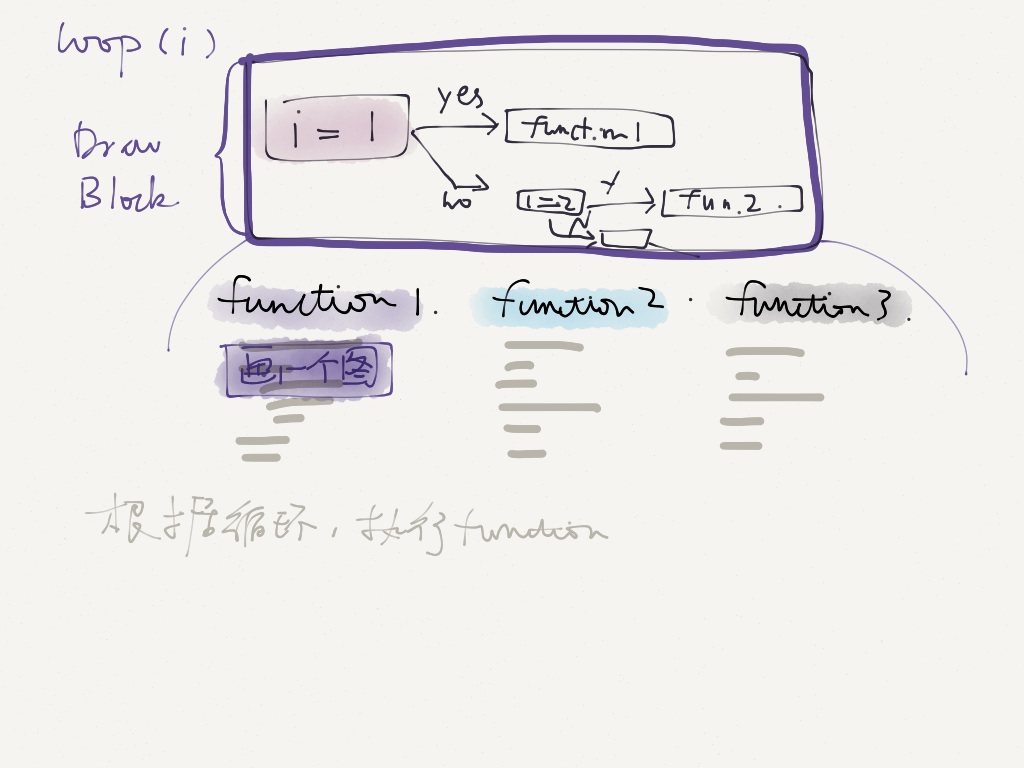
The goal is to let the user type in a series of number, such as QuiltRows and QuiltColumns, then the program will decide how to arrange these patterns and draw them in an appropriate position.
In order to have a more appealing visual of the whole image, each quilt block has a gap area in between. There's also an outside frame for the finished quilt, and it scales proportionally with the quilt's dimension.
|
Some note for designing the cyclic algorithm
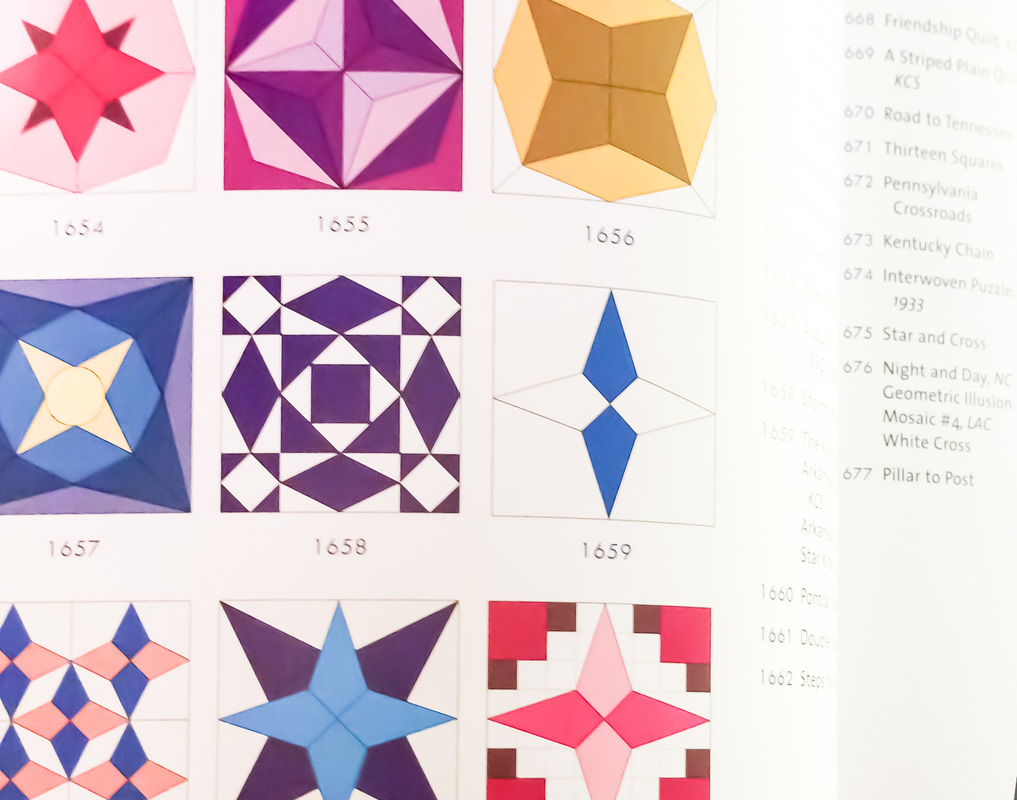
What is a Sampler Quilt?It's a quilt with each block has a different pattern, such as these...
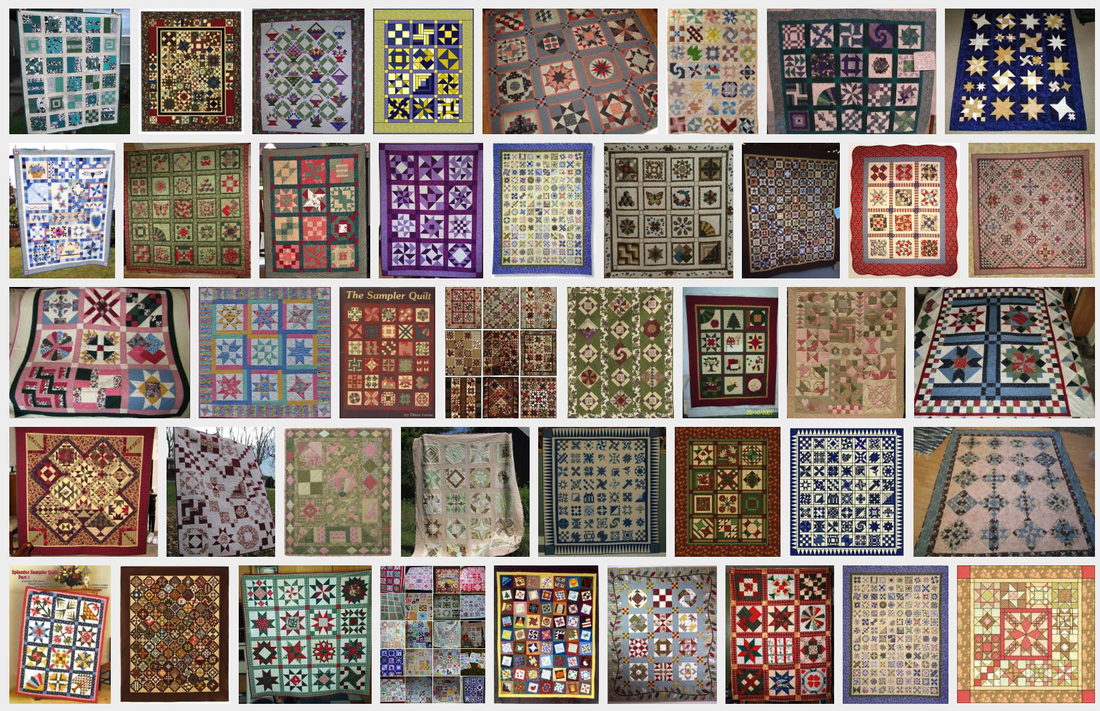
Most of the pattern distribution rule in these sampler quilts are designed by the quilt maker. However, the requirement here is to draw these patterns in a cyclic manner.
|
The Quilt Patterns
|
The following examples are about the five patterns included in the final sampler quilt, each of them has unique figure and geometric shape.
For each pattern there is a new challenge, such as pattern repetition, dashed line, triangular shape, etc.
|
The First Pattern - "Winding Ways"or, "Wheel of Mystery"
For the first sampler quilt pattern, I choose a traditional American quilt pattern called "Winding Ways", also known as "Wheel of Mystery".
The pattern is famous for its repetition of illusionary circular shapes. That makes it quite a funny one to begin with.
|
March 30th, 2013
|
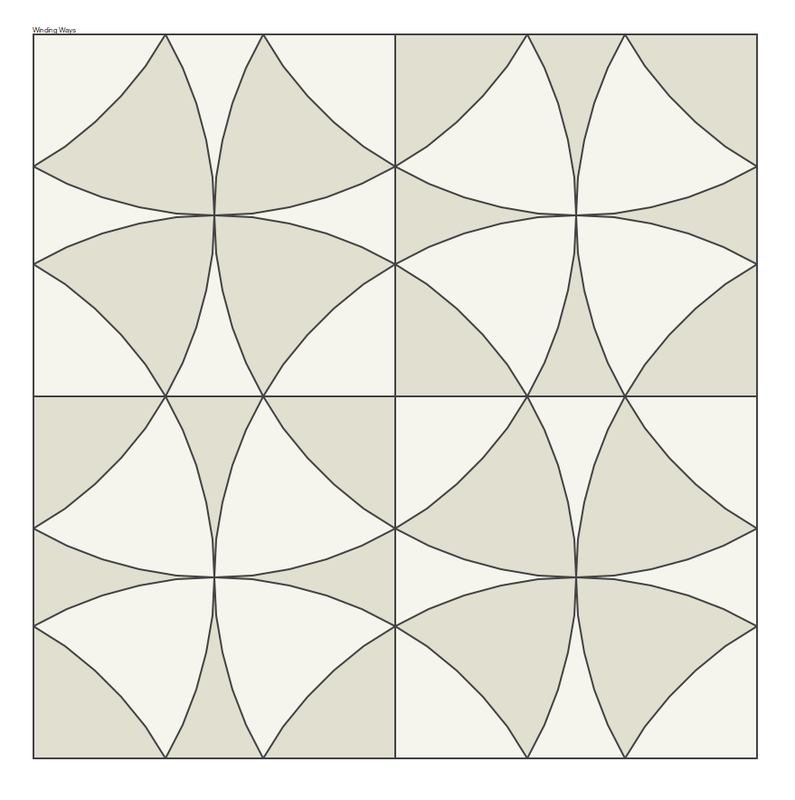
"Winding Ways", finished pattern in a single block.
|
Algorithm for this patternAlgorithm for drawing the Arc Shape
Algorithm for assigning color
Traditionally this pattern will be repeated several times to form a large circle appeared on the quilt, so the pattern and its color attribute must be repeatable, regardless of its size and position.
|
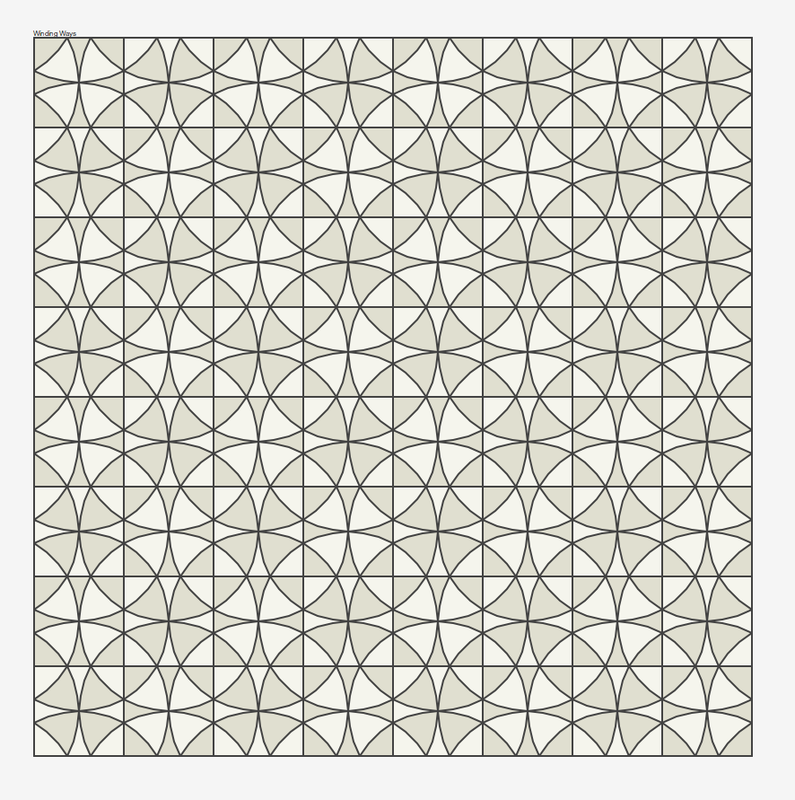
"Winding Ways", finished pattern in a repetition quilt, with the illusionary circles.
|
Difficulties
Solution
|
|
"Winding Ways", screen-recorded animation
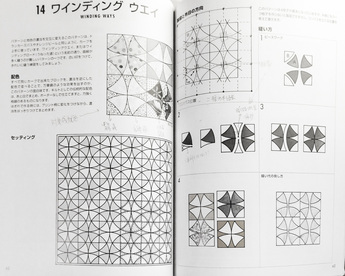
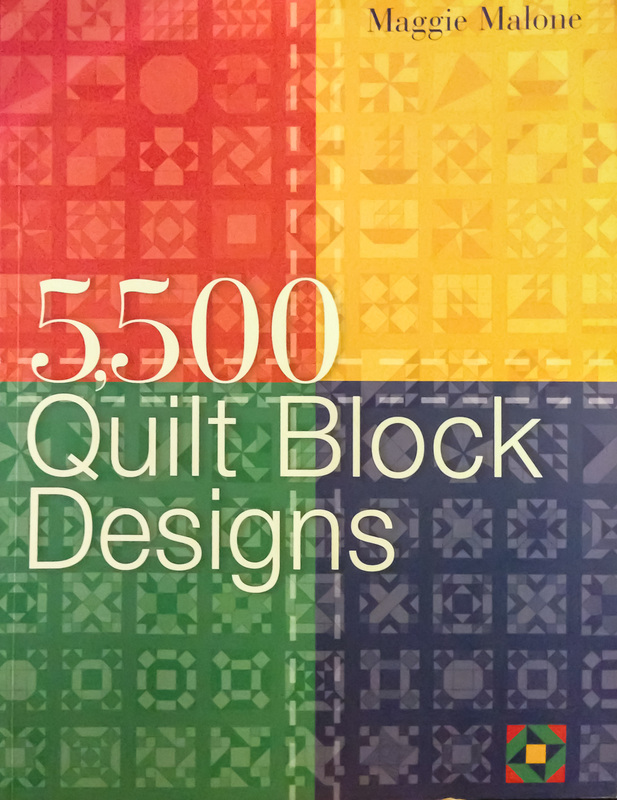
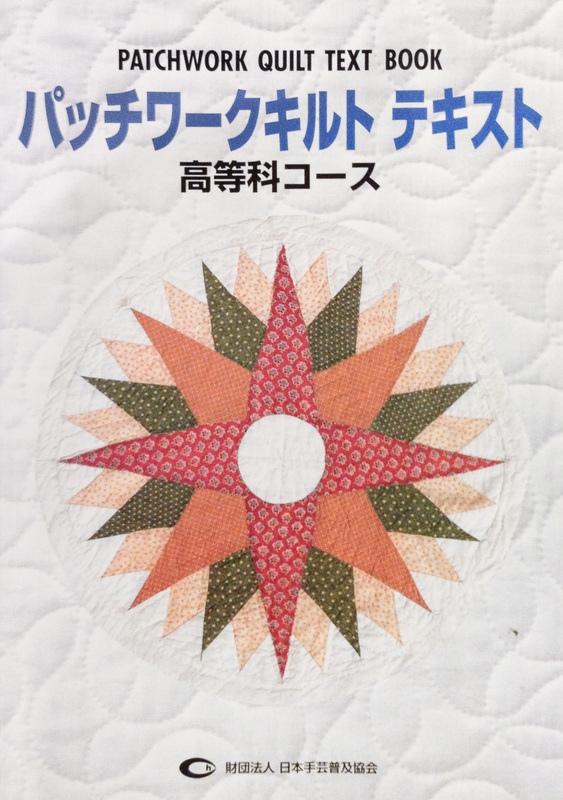
Reference from "Patchwork Quilt Text Book" published by ...
Full Code Download:
|
##    New Version Algorithm, can control the repetition number
##    and assign color using modulus
    currentColorList = [color1, color2]
    for j in range(0,arcRepeat):
        moveit(currentPos)
        y = turtle.ycor()
        for i in range(0,arcRepeat):
            x = turtle.xcor()
            turtle.pu()
            turtle.goto(x + i * glbBlockLength/arcRepeat, y - j * glbBlockLength/arcRepeat)
            turtle.pd()
            turtle.seth(0)
            drawSubBlock(currentColorList[0 + (i+j+1) % 2])
            gotoSubBlockCenter()
            drawArcBlock(currentColorList[0 + (i+j) % 2])
            moveit(currentPos)
        turtle.seth(0)
def drawArcPiece(color):
turtle.begin_fill ()
turtle.fillcolor(color)
turtle.circle(glbBlockLength/2, 360/12)
turtle.right(360/6)
turtle.circle(glbBlockLength/2, -(360/12))
turtle.right(360/6)
turtle.circle(glbBlockLength/2, 360/12)
turtle.end_fill ()
def drawArcBlock(color):
for i in range(0,2):
drawArcPiece(color)
turtle.right(90)
drawArcPiece(color)
gotoBlockCenter(-1,4) | ||||
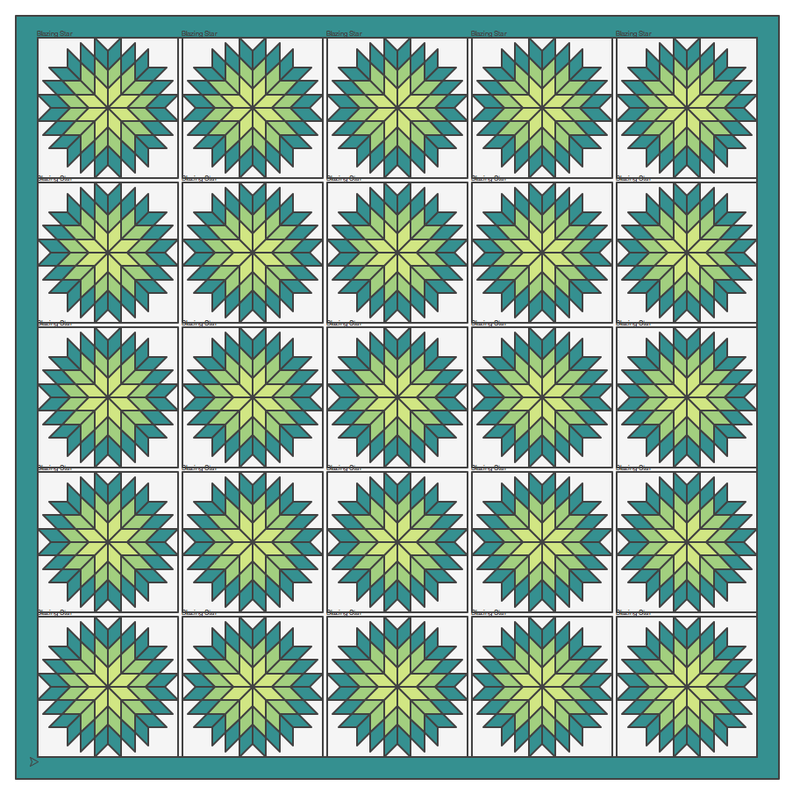
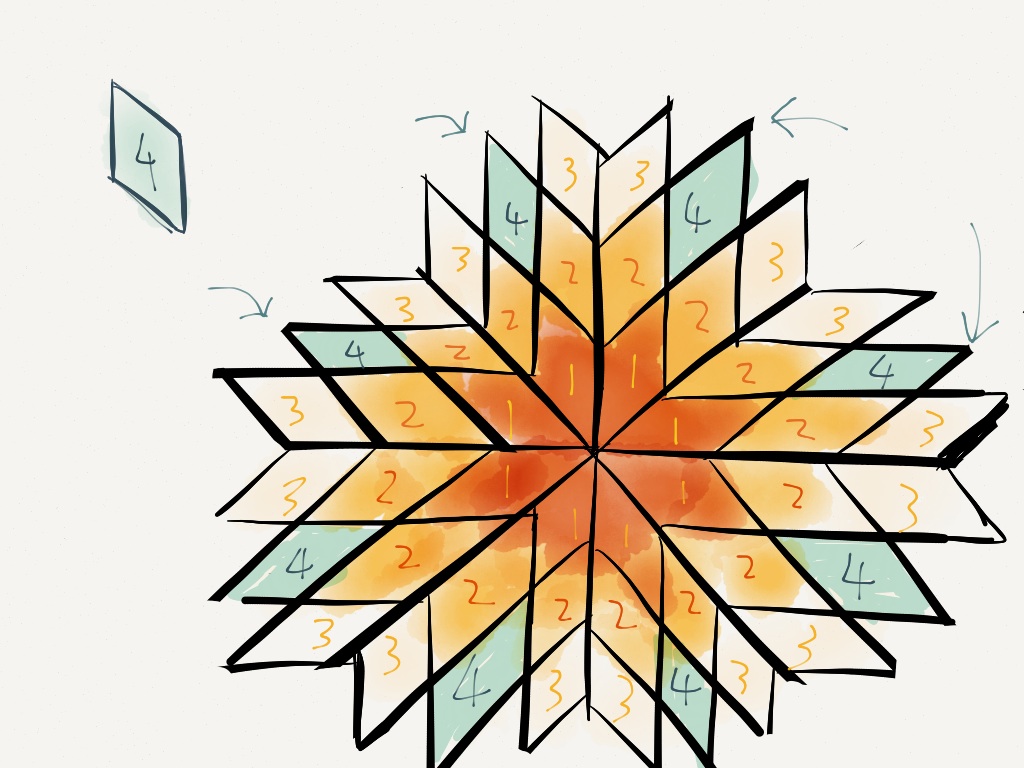
The Second Pattern - "Blazing Star"
|
Algorithm for this pattern
Difficulties
|
    #3rd layer middle
    ## use this offset function to draw the diamond shape into it's position
    def offsetMid(a,b):
        turtle.penup()
        turtle.forward(diamondSide*a)
        turtle.right(45)
        turtle.forward(diamondSide*b)
        turtle.left(45)
        turtle.pendown()
    for i in range(0,8):
        cCenterPos = turtle.pos()
        offsetMid(-1,1)
        turtle.begin_fill()
        turtle.fillcolor(color4)
        drawDiamond(diamondSide, 2, 1)
        turtle.end_fill()
        turtle.penup()
        turtle.goto(cCenterPos)
        turtle.pendown()
turtle.right(45) |
Solution
|
|
"Blazing Star", screen-recorded animation
|
    #3rd layer clockwise
    for i in range(0,8):
        turtle.begin_fill()
        turtle.fillcolor(color4)
        drawDiamond(diamondSide, 2, 1)
        turtle.right(45)
        turtle.end_fill()
    #3rd layer counter clockwise
    for i in range(0,8):
        turtle.begin_fill()
        turtle.fillcolor(color4)
        drawDiamond(diamondSide, 2, -1)
        turtle.right(45)
turtle.end_fill() | ||
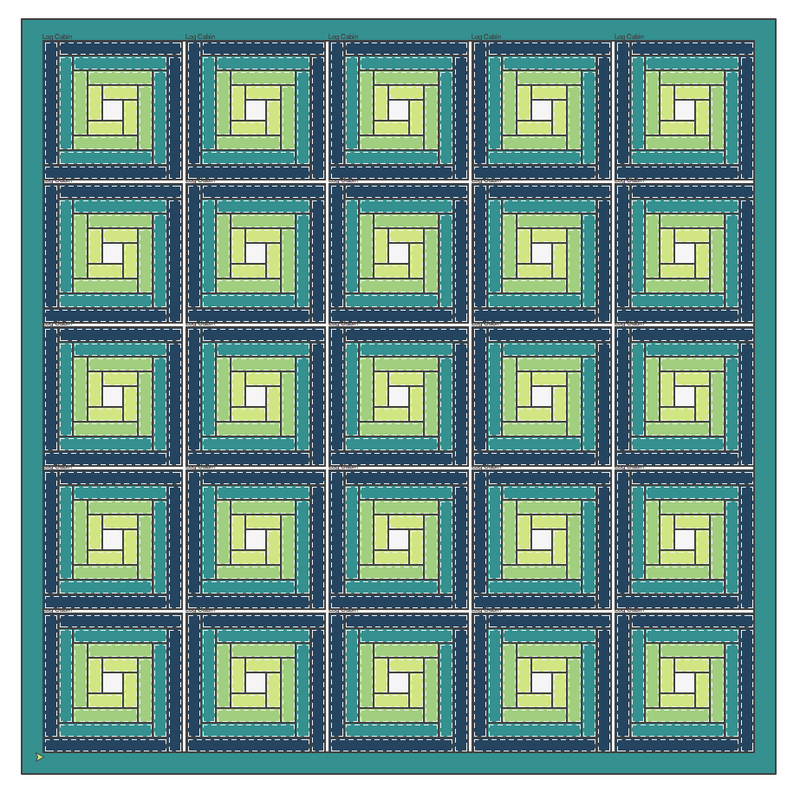
The Third Pattern - "Log Cabin"
|
Algorithm for this patternThis pattern are in common with many programming concept, such as loop and nested loops.
In order to draw each rectangle shape with incremental length, while maintain the same width, a simple algorithm is used to define a function which will draw rectangles based on the layer order it's in.
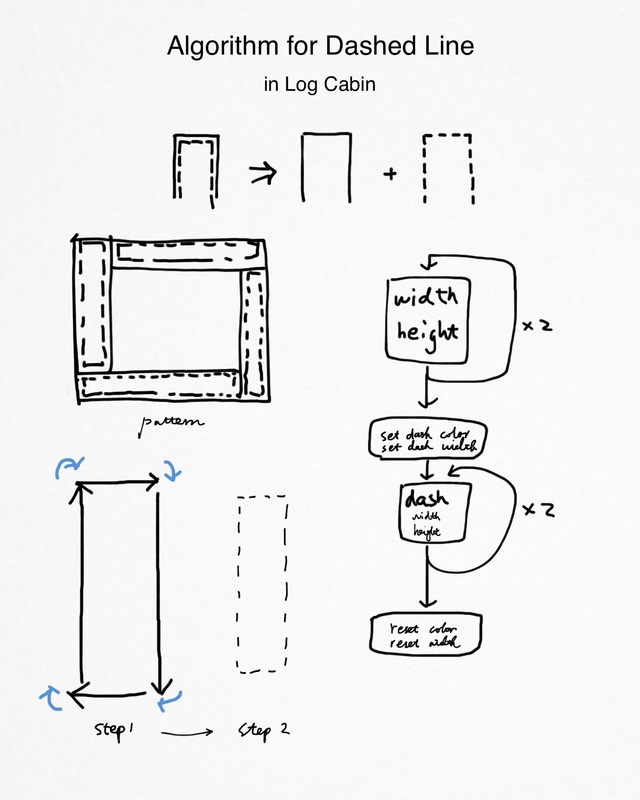
Dashed LineIn addition to the basic pattern design, some details are added for a more appealing visual.
I developed an algorithm to draw the dashed lines within each rectangle shape. Thus it became the major challenge in this pattern.
Difficulties
Solution
Also, defined more functions doing the job of setting up beginning position, and make sure the turtle returns to it's beginning position after successfully drawing a dashed line rectangle.
|
|
## Dashed Line Function
def dashline (length, dashLength):
    beginPos = turtle.pos()

    ##the remain length of the whole dash line:
    remainlength = length

    ##set the step number needs to draw the dash line:
    for dashStep in range (0, (length - length % dashLength)/dashLength/2+1):
##        print "Dash Step:", dashStep

        ##draw the dash line
        if remainlength >= dashLength * 2:
            turtle.pendown()
            turtle.forward(dashLength)
            turtle.penup()
            turtle.forward(dashLength)
            ##update the remainlength
            remainlength = remainlength - dashLength * 2

        ##draw the last step, based on the remain length
        elif remainlength < dashLength *2:
            turtle.pendown()
turtle.forward(remainlength) | ||||
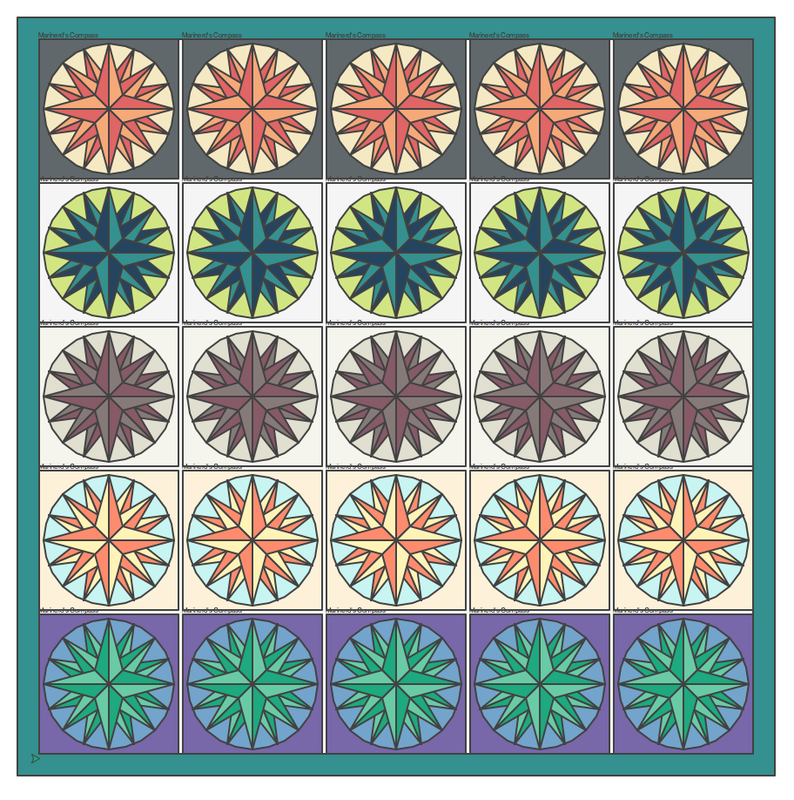
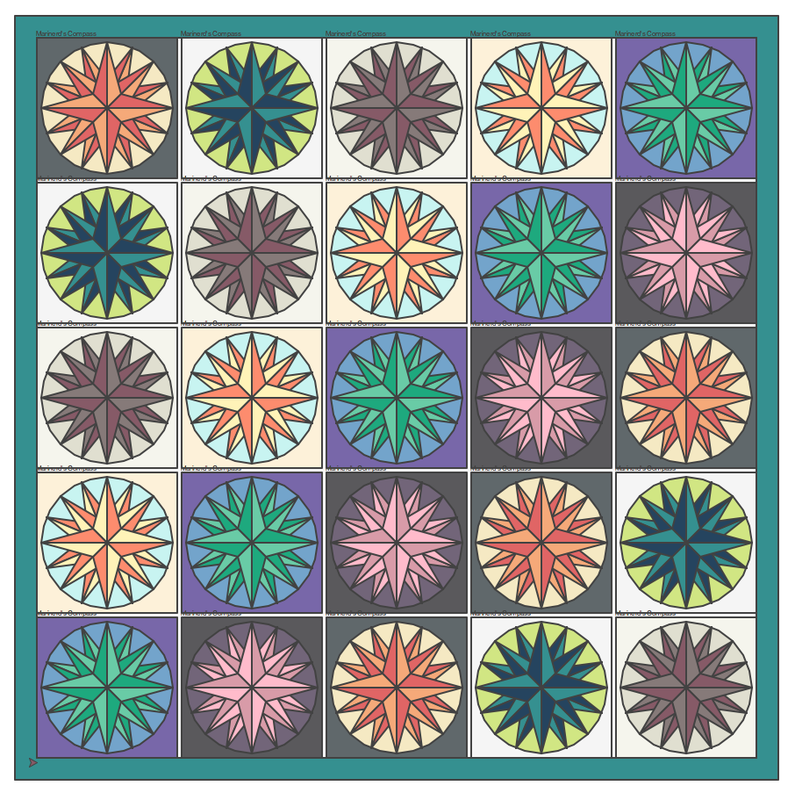
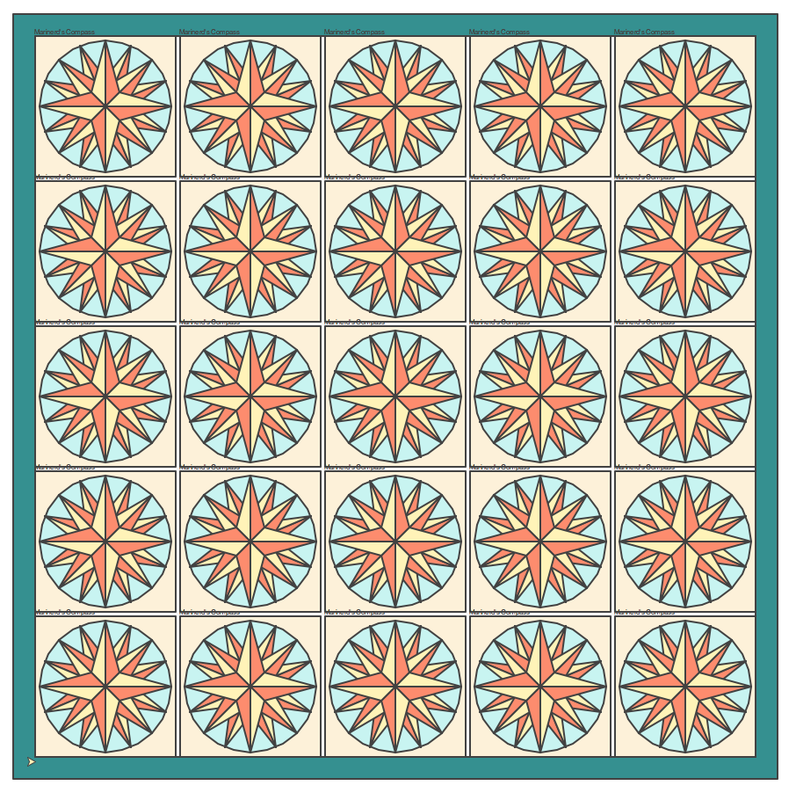
The Fourth Pattern - "Marinerd's Compass"
|
|
|
Algorithm for this patternThe major challenge here is to draw each triangle shape in certain order, so that they could form a compass with layers.
Difficulties
SolutionKeep in mind that the sin and cos function's input value is in radiance by default.
|
|
|
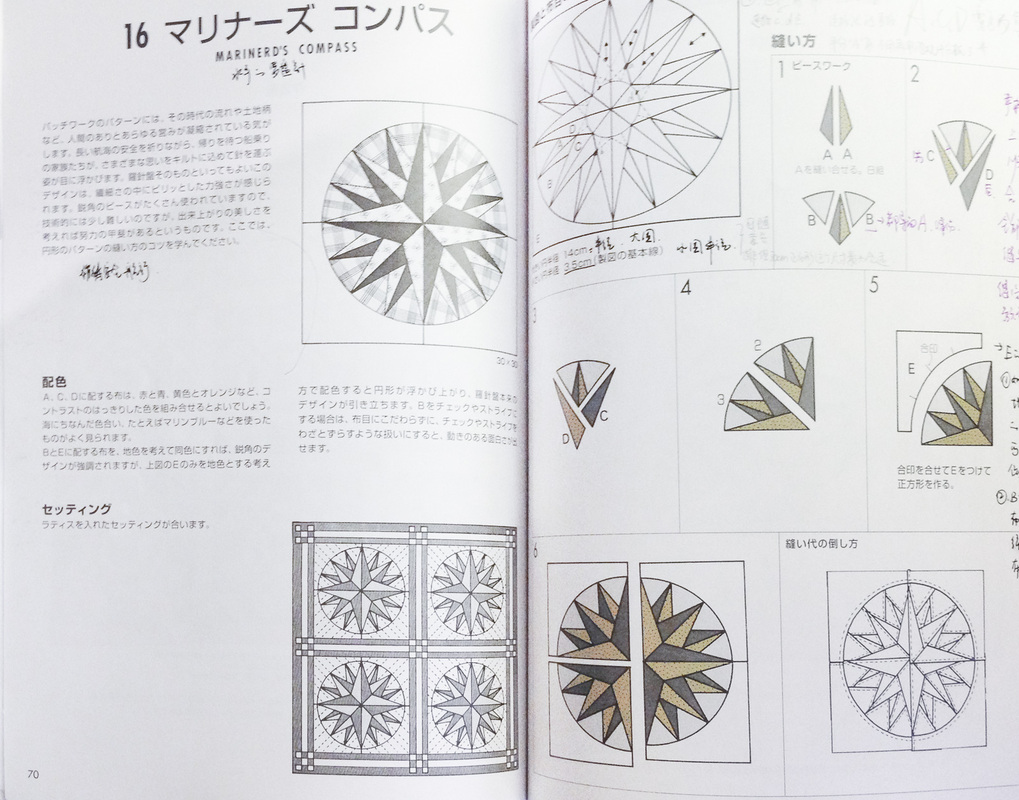
Reference from "Patchwork Quilt Text Book".
|
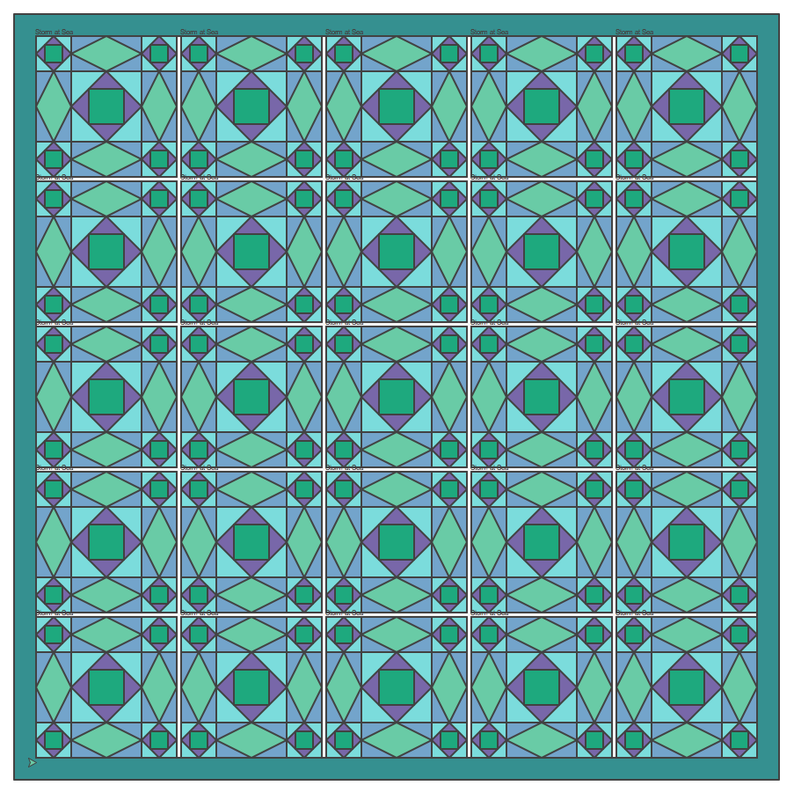
The Fifth Pattern - "Storm at Sea"
|
|
|
|
Resources and External Link
Python Programming
Instructions and information on Professor Deborah R. Fowler's website.
Useful documentation about Python Programming and Turtle Graphic.
The Python Code embed as HTML in this webpage is converted using Professor Malcolm Kesson's Cutter Text Editor. Also there's some useful information about Python programming on his website.
Quilt Pattern
|
Reference Books
Online Resources
Adobe® Kuler®.
|
|